Sunday, December 30, 2012

3-D Accordian album

I'll be teaching a class in Springfield at Karen and Friends Creations on this 3-D accordian Album.  Since it is somewhat close to Valentines Day, I decided to make it something they could use for Valentine's Day.  Hope what you see inspires you!


I used the following supplies to make this album:

Sizzix Bigz Die - Karen Burniston Album, Accordion Flip 3-D
Sizzix Dies Karen Burniston Bigz Frame & Label Bracket
Sizzix Tim Holtz Die - Hardware Findings
Sizzix Tim Holtz Die - Heart Wings
Spellbinders die - Fancy Tags Three
Spellbinders die - Oval die
Marvy Scallop Heart Punch
Marvy Heart Punch
Elizabeth Craft Glitter Dots - Red
K & Co - Black and White paper pack
Black Cardstock
Bazzill Smoothie cardstock - Cherry Splash
Gold Embossing Powder
Embossing Pad
Sponge for inking
Chipboard (I just used a cracker box)
Fine gold cord
Black brads
White sheer ribbon
Clear rhinestones
Red glitter adhesive sheet

Thursday, December 27, 2012

It's all Good!

My daughter is married to a wonderful man.  I think part of the reason he is a wonderful husband is because of his mother.  Sally Stone is his mom and she has endured a lot in her life.  She became a paraplegic after a doctor botched a number of spinal block when Sally was delivering her second son (my daughter's husband). 

She wrote a book about her ordeal and how God helped her through that trying time.  (sometimes it is still trying for her).  If you love to read, you might want to read this one!!!   it is called "It's All Good".  You can get it directly from Sally HERE or Amazon or Barnes & Noble. 

So.....start your new year out reading!

Monday, December 17, 2012


Got the tree finally done on Saturday.  It is a beautiful noble that we got for only $20.  We went to the same place as last year.  I love that it isn't too wide at the bottom.  It is right at 11' tall.  That is Gabby in the foreground........she looks much bigger than she really is because she was so much closer than Ray.  The tree really doesn't have two lights on the side of it.....that is a reflection off the windows from the lights above me.  I was just too lazy to digitize them out of the photo and hadn't noticed until it was posted!  Hahahah.  We celebrated my daughter's 31st birthday here last night.  Hard to believe my youngest is 31!!!!!!  We had everyone over for the celebration.  Potato bar for dinner and ice cream sundae bar for dessert. 

Next week will be a scramble to finish up shopping and finally get some time with my Christmas card.....I haven't even designed them yet this year!  Plus lots of piano practice for the song I'll be playing to accompany choir on Christmas eve.  AND some practice for the song the family will be singing for Christmas Eve offering time!  Phew!  It is going to be a busy week.  Throw in a visit from an out of town friend and getting the dog to the groomer and I'll be lucky to breathe!

Sunday, December 16, 2012

Distress Stain Dip


This technique was in the October 2012 Technique Junkie newsletter.  This is one of the cards that my Eugene class could do last Friday.  Most of them didn't get to it.  We had six different techniques that they learned using Distress Ink Pads, Refills and Stains.  We all got pretty inky!  That darling image is from Peddler's Pack located in Beaverton.  The words around the border and on the card are just handwritten.  My class was done around 9pm and I was on the road by 9:30 pm and home by 11:10pm.  Good thing I am a night person!  It is always much nicer to sleep in your own bed!

Wednesday, December 5, 2012

BLOG HOP!

Well........Here is the great blog hop with prizes that I was telling you about!!

Technique Junkie Newsletter, Sweet ‘n Sassy Stamps, and Eclectic Paperie have teamed together for this great hop. 5 designers from Sweet ‘n Sassy Stamps, 5 designers from Eclectic Paperie and 6 Designers from Technique Junkie Newsletter have some really wonderful projects to show you from the recent Great Gifts CD from TJ!

Each of the companies will be giving away a prize randomly drawn from their designers' blogs as follows:

  • EP: 25% discount on a future order
  • SNSS: $15 store credit
  • TJN: Great Gifts CD or any TJN CD of winner's choice

The winners will be posted on each company's blog by Sunday, December 9th.

To be included in the prize drawings, please comment by midnight Friday, December 7th.
 

We have some FANTASTIC team members on this hop:

From Sweet 'n Sassy Stamps
Monika Davis
Ceal Pritchett
Giovana Smith
Cathy McCauley
Jennie Harper

From Technique Junkie Newsletter
Holly Brown
Judy Jackson
Ann Clack (that's me!)
Jane Bosi
Jackie Kalchert
Pat Huntoon

From Eclectic Paperie

Sherry Cheever
Mary-Ann Maldanado
Micki Harper
Broni Holcombe
Julie Masse

MY project uses a project from the Technique Junkie Great Gifts CD called the K Cup Gift Box.  This box uses the darling stamp set from Sweet 'n Sassy Stamps called Cozy Friends.  I used the bear stamp from the set but it also has a darling Penguin!!  The bear was colored using Copic Markers.  The words stamped on the wooden tag are also from the cozy Friends set.    From Eclectic Paperie I used patterned paper from the Winter Wishes pad, baker's twine,  a wooden tag from Maya Rd, buttons from the Ice collection, and a Maya Rd crystal stick pin.  I also had coasters from Eclectic Paperie and they are thin enough that my dies cut them easily!  Yeah!  I used the coaster as a backing to make the bear into a more stiff tag.  I just colored it with my copics to match the bear.  Awesome!


Below is a little more about each company:

eclectic Paperie
is an online boutique for all who love paper crafts. We have an eclectic assortment of products, supplies, tools, and materials to assist you in your quest for creative expression. We know you will find something to "feed your creativity".

Technique Junkie Newsletter
is a bi-monthly publication with step by step tutorials which encourage you to use your supplies in fun and creative ways. TJN also produces tutorial CDs with printable PDFs in a variety of themes.

Sweet 'n Sassy Stamps
is a small, family-owned, Christian company offering exclusive images and designs in both clear and digital stamps. We also carry a small number of exclusive die designs, some of which coordinate with our stamps.


Special Announcement and Past Sale!

Tomorrow, please make sure you drop by my blog for a great blog hop with prizes from three different companies!!  More details on that tomorrow.


Now........for the past sale.  I had the sale at the University Club yesterday.  It would have been a little better if I hadn't been getting sick.  Right now I could sing bass in the choir!  HA!  The ladies at the sale were just fabulous.  The big hit was the snowglobes.  out of 36, I only have 5 left!  Yeah!!  The pyramid boxes were the next loved item.  They loved the Exploding boxes but not that many sold.  ;-(  All in all, I did great and was very pleased.  Here is a picture of my table.  This was taken after the first onslaught of customers before their luncheon.  More people came after the luncheon.  We didn't think of taking a picture before so most of the snowglobes were already gone.   My daughter went along to help me.  Braelyn came along as well and was a big hit with all the ladies.  I'm holding her while mommy takes the picture.

Monday, December 3, 2012

Lots for the University club Sale!`

I've been working sooo hard!  My crafts are getting done but the housework certainly isn't.  After the University Club sale, our car club is having Christmas HERE!!!!    I'll have to work like mad to clean and decorate by Saturday!

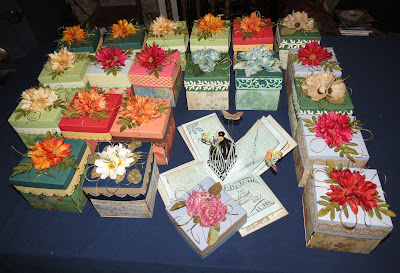
Here are some pictures of my work for Tuesday's sale.    I made 30 circle boxes.  12 Pyramid boxes (from the Great Gifts CD by Technique Junkie.......you can buy one from my sidebar!)    21 Exploding boxes with a surprise   and 52  snowglobes!  Phew!  Here are some pictures of them.


Friday, November 30, 2012

Okay....Thanksgiving is over so we can now look forward to Christmas! Here is a darling Snowman card I'll be teaching to a class. The snowman is colored using the TJ technique called Distress Ink Watercoloring. Really easy with great results. The background of the card is made using the TJ technique called Distressed Spritzing. I used a stencil from The Crafter's Workshop. The snowflake is a punch from EK Success. Hope you enjoy!

Saturday, November 17, 2012

Cute little snowmen!

I've been working really hard getting things done for my upcoming vendor spot at the University Club of Portland.

My goal was to have 35 snowglobes done for that sale (plus the 15 from special orders).  That's 50 total to do.  CRAZY!  Anyways.........I don't normally do too many of the snowmen because they are crazy involved.  There are 12 pieces and each needs to be colored on both sides.  AND when they are done they are only 2" Tall!!!!   Hope you enjoy those little masterpieces!!  If you are interested in making your own snowglobes.......head on over to Some Assembly Required!  Tell Sandy I sent you.  I don't get anything for it, just thought she'd like to know.  The dies are called Slice Forms on the site.

Friday, November 9, 2012

PCP's winner of the week was ME!

Have you ever visited Paper Craft Planet?  No?  Here is a link.

They have all kinds of challenges, free digis, and giveaways all the time.  Susanna Boyd does a great job with the site and I think you'll enjoy it if you go.

Well........they had this really great tutorial on how to use Dreamweaver stencils, adhesive sheets, glitter and Tim Holtz distress powders.  (HINT:  you may have to log in to view the tutorial)   AWESOME!  BUT.....what was even more awesome was that they had a weekly giveaway of a stencil from Stencil with Style and this week it was ME!!

Now the hard part will be to pick ONE. 

Thursday, November 1, 2012

THE BEST CANDY EVER!

No.....this is NOT a critique about Halloween candy!!  BUT it certainly is THE best blog candy ever.  Pat Huntoon from the Technique Junkie newsletter is offering a LIFETIME membership to ONE lucky blog candy winner!!!

Go HERE to enter!

You'd get over 100 techniques every year and all the special CD's that are produced.  SUCH an awesome prize, you just can't miss out!

Wednesday, October 31, 2012

Our Newest Family member!

Yesterday at 7:10pm, little Braelyn Rae Zagel made her appearance into this ol' world. Mommy, Leah, was induced 17 days early due to cholestatis problems. Little Braelyn surely doesn't look 17 days early though. She weighed in at 7 lbs 11oz and was 19.5" long. Nice bit of hair and cute little baby rolls. Mommy and Baby (Daddy too) are all doing great. I thank them for letting me be there to experience this miracle! It was a wonderful experience! Here are a few pictures for you!!
Her first minutes of life 

 The Happy Zagel Family
 Me - the Happy Grandma
 Look at all the hair!
Braelyn Rae chillin' in the warmer!

Tuesday, October 30, 2012

TODAY is your 'guest designer' chance!!!!!!

The Technique Junkie newsletter has had a 10th anniversary bash all month long!!  Today is a special blog hop where Pat (TJ's owner), is giving away THE best gift of all the days........A CHANCE TO WIN A 'guest designer'  SPOT FOR AN ISSUE!!!

This blog hop starts HERE.  Make sure you start at the beginning so you don't miss any of the inspiration on each blog!

To be eligible for the chance, you need to comment on all the blogs on the hop. 

So.............if you arrived here from Beth's blog, you are in the right place!!  Didn't she share a great technique?!!

My technique is called Popped Blooms from the August 2011 issue of Technique Junkie.  I can't believe that I waited so long to try this technique!!  So easy with such an elegant impact!!  I hope that you enjoy!!


Make sure you comment on my blog, then hop on over to Holly's blog HERE.  I hear that there is going to be something glittery there!

Good luck!

Sunday, October 28, 2012

Faux Chinese Fern

I had a card in my "love it" file that had a cool fern with a chinese/japanese symbol in the upper corner.  Well.......I didn't have a stamp like that so I created something similar, then redesigned the layout of the card as well.  I used a solid stamp with a light golden pad edged in the dark green.  Stamped the fern and then added the small leaf in the upper right corner to replicate the look of the symbol on the other card.  I'm happy with the outcome.  The original card had the three images beside each other.  Since my image was wider, they wouldn't fit the way I wanted so I overlapped them instead.    Enjoy!

Saturday, October 27, 2012

Feel Better butterfly

This thinking of you card was inspired by a card I had saved on my computer WAY back when.  The original card was made by Linda Bullard, whose work on Splitcoaststampers was on my "Love" list!  I made this into a get well card.  Counting down to the sale...only 5 productive days left.


Well....I really wanted my day to be card productive but it turned into a dog productive day instead.  I decided that instead of waiting until the last minute to bathe my standard poodle, Gabby, for my sale, I would do it today instead.  While soaping her down, I noticed some odd looking skin problems on her tail and back.  When I told my mom about it (she lives with us), she mentioned that she just saw a bug on her mini poodle.  Augh!!!   I checked Yoyo (mom's poodle) and he was covered in fleas.  How could this happen so fast?????   So........I had barely gotten Gabby dried from her bath to turn around and bathe Yoyo as well.  We saw a lot of fleas wash down the drain!   So....once Yoyo was dry, I ran Gabby to the vet.  Sebaceous cyst was the diagnosis.    A number of real tiny ones on her tail.  the skin problem on her back?  The vet just thought it was aging skin.  Hmmmmm.......think I'll just watch it in case.  While I was there.....got some Advantage for Yoyo.  Got to nip these fleas in the bud!!

Wednesday, October 24, 2012

Layered Goosebumps


This card uses a lovely collage stamp from I brake for Stamps.  It also uses the Layered Goosebumps technique from the Oct 12 TJ newsletter.  I should have probably used colors that were slightly different.   That Goosebumps spray is really weird.  Dries with kind of a rubbery feeling.....smells rubbery too!  You MUST remember to clean anything that it touches right away.  (Not your card, just your tools).  I speak from experience as I have one ruler that is covered with the spray and it does NOT come off. 

Tuesday, October 23, 2012

Another layered masked collage


This is another Layered Masked Collage card.  Technique from the Oct 2012 TJ newsletter.  The cool fish image is from I Brake for Stamps.  If you are a TJ subscriber, you get a discount from her site!  She has great customer service, ships quick and is easy to work with. 

Monday, October 22, 2012

Another Copic Airbrush Direct


Here is another Copic Airbrush Direct technique card using another of my Stamp Camp background stamps.  I just love the way this technique makes it look so watercolory!  Getting lots done for my sale......it is coming up is a few short weeks!  Augh!!!!!!!!

Sunday, October 21, 2012

Layered Goosebumps Cross


The cross stamp on this card is from Heartfelt Creations.    I used the Layered Goosebumps technique from the Oct 12 TJ newsletter.  I'm not sure why but the color photo'd really strange on this card.  Maybe the rubbery smell from the Goosebumps, threw the camera off....hahahahahahha.

Saturday, October 20, 2012

Copic Airbrush Direct


The background stamp is from Stamp Camp......I have a ton of their background.  They are a sponsor the the TJ newsletter and their stamps were perfect for the new Copic Airbrush Direct technique.  I also got to use one of my newer Spellbinders dies.  Enjoy!

Friday, October 19, 2012

A sad, sad day.

Yesterday we lost a member of the family.  Our shepherd mix, Willie, succumbed to his Cushings disease and left for that doggie heaven where he can chase all the kitties he wants.  He was a pound puppy that we inherited from some friends.  He was 130 lbs of love and kindness.  He was part Husky and had the hair to prove it.  Our hearts are heavy.  It was sad to see him die yesterday.  It was also somewhat unexpected as he was walking around several times like normal.  He hadn't eaten for several days and yesterday he even refused his treat.  We knew he wasn't doing well.  We noticed that he was laying in the entry flower bed where he often does but was laying kind of funny.  We went over to him and found him breathing really heavy.  His eyes were dialated and gums were black.  We were pretty sure he wouldn't last long, and he didn't.  I was happy that we could be there with him in his last minutes.  We will miss him a bunch.  Here is a nice picture of him taken a couple of years ago.  If you have doggies, give them a big hug for me!

Just poppin by to say hello!

This cute card is made with a pop n cut die from Sizzix that has flowers on it.  It is teamed up with the corresponding "Hello" sizzlets set.  Lovin' these new dies so much!  Got four of these done for my sale.  Hope you enjoy!! 

Today we are hoping to have our car lift installed!  Woo Hoo!  No more crawling on the cold concrete to do oil changes and car repair.  Maybe we should rent it out to help pay for it~!!


Thursday, October 18, 2012

Fun to Die For!

I recently ordered a number of the Sizzix pop n cut dies. Boy are they a lot of fun.  I wish the housework would disappear and I could just play all day!!  This card was made with the "love" pop n cut die.  Unfortunately, the carrier for the die is on backorder but I made it work anyway.  Had to create a unique sandwich to do it. 
Big Shot sandwich:
1.  black pad (the one I use for embossing)
2.  clear cutting pad
3.  Pop N Cut die
4.  Paper
5.  Clear cutting pad

The stamp set is from Sweet N Sassy and it is a wonderful Paris set with words and this awesome collage stamp.  I've always had issues with coloring in collage stamps (don't know why, just do), so I just LOVE using the Technique Junkie technique called Colored Circle collage.  Easy, peasy!!

The countdown has begun for the card sale.  I never feel totally ready!


Wednesday, October 17, 2012

Layered Masked Collage dragonfly


The October Technique Junkie newsletter is just full of fun/cool techniques.  This one is layered masked collage.  It is sooooo much prettier in real life.  The dragonfly has glitter and really pops off the page.  He is a stamp from Artneko.com.  Although I think they have another business name now.  Think I'll have to make a few more of this one for my sale...........it was very fun to make!

Tuesday, October 16, 2012

Four the same but different

I needed a few more sympathy cards for my sale.  The band of color on this card was created on a separate piece of watercolor paper.  I included all four cards (I usually make four) because each scene was a little different.  I just used my Distress Pads directly to the watercolor paper, spritzed with water, dried with my heat gun and stamped.    I stamped the cardstock with the silhouette leaves, then mounted the watercolor panel and restamped it again.  I'm off a little on one of the cards but you don't really notice much.  Fast, easy and lots of eye candy bang for the buck (time).    I love the way the 'scene's have 'clouds' and some faux mountains.  Sorry the third one is a little blurry.......I think I hit a button I shouldn't have one my camera!


Monday, October 15, 2012

Simon's Dies.


The Meadow Rue and the Daisy dies for this card are from Simon Says.  This card was also inspired by kwerner on her blog.  I thank her for the inspiration when I needed it.  Sometimes when the mojo is hiding in the craft room, you just have to CASE a card to get it flowing again.  Really lovin' these dies.  They are popped up with foam tape. 

I taught two classes on Saturday in Springfield.  One copic class and one class on a cute little circle box that I make.  One of the gals in my copic class knew Marianne Walker (they were members of the same church).  Sheesh!  She could have learned MUCH more from Marianne!  I hope that she actually learned something in the class.  Hope she gives a good report to Marianne too!!  I had prepped 20 circle box kits for the class and there were only 10 people for it BUT they purchased all the extra kits that I had so I was really tickled.  More mulah for craft stuff!!

I'm scheduled to teach there again on Dec 8th for my Pyramid class.  Hoping to through another class along with it so make it worth the trip!!

Sunday, October 14, 2012

Simple Sympathy


This is just a really simple sympathy card for my upcoming sale.  Sometimes I get all involved in a card and it takes a ton of time to complete.  Then there are times when I just want to do something simple and those cards are just as pleasing.  The photo made the ribbon look way different in color than the paper but it isn't!

Saturday, October 13, 2012

Colorwash alcohol


This card was inspired by a similar one on the kwerner blog.  She is the biggest reason I purchased the rue and daisies dies from Simon Says!!  I also used two TJ techniques on this card.  The first is Colorwash ....that's the background behind the flowers.  It is from the August 2012 issue.  The other technique is Framed Nesties Window from the Aug 2011 issue.  Did you know that you can purchase the CD's for each year of the TJ newsletter.  They aren't that expensive and you get a TON of techniques (75 - 90) on each CD.  You can purchase the special CD's from the dropdown on my sidebar.  The yearly CD's can be purchased from www.patstamps.com

Friday, October 12, 2012

Silhouette Sympathy


Sometimes a black flower silhouette can say volumes!  I decided that this would be a sympathy card and there is a sentiment inside about sympathy.  The panel that the flower is on is watercolor paper that I rubbed Distress Inks over, spritzed, dried, then stamped.  I made four of these and each panel is different and reminds you of a miniature watercolor.    I really love working with the distress pads.  They are pretty versatile!!  I loved the way this panel looked like clouds in the sky. 

Thursday, October 11, 2012

Inky Bands and Loopy Flowers


I've had the ribbon on this card for absolutely ages.  Every time I wanted to use it on a card (because the colors are so pretty), it was just too big for what I wanted.  Well.....while I was surfing around on Splitcoaststampers the other day, I ran across their tutorial on making loopy felt flowers.  I thought I would make the technique work for my wide ribbon.  It worked pretty good!  To set the colors of the flower off, the Inky Bands technique from the most recently TJ newsletter was just perfect!  I used Distress Inks for the band.  After I was done, the panel looked just a little too bare for me so I added some wavy lines.  The sentiment is from Hero Arts.    I did think that it was kind of ironic that the technique helps you make a flat card that is great for mailing.......then I put a fat pearl brad on it.  HA!